Introduction
Web animations have evolved significantly over the years, providing developers with powerful tools to create engaging and dynamic user experiences. One such captivating effect is the on-scroll fire transition, which leverages the power of WebGL and GSAP ScrollTrigger. This tutorial will guide you through the process of creating an impressive fire transition effect that animates as users scroll through a webpage.
Understanding the Components
Before diving into the code, it’s essential to understand the key components involved in creating this effect:
- HTML and CSS: These form the backbone of our webpage, providing structure and styling.
- WebGL: A JavaScript API used for rendering 2D and 3D graphics within any compatible web browser.
- GSAP (GreenSock Animation Platform): A powerful JavaScript library for creating high-performance animations.
- ScrollTrigger: A plugin for GSAP that allows you to create animations based on the user’s scroll position.
- Shaders: Programs written in GLSL (OpenGL Shading Language) that run on the GPU to perform rendering effects.
HTML Structure
The HTML structure for our fire transition effect is straightforward. We have a main container .page, a header, content paragraphs, a canvas element for the WebGL rendering, and a scroll message to prompt users to scroll.
<!DOCTYPE html>
<html lang="en">
<head>
<meta charset="UTF-8">
<title>On-Scroll Fire Transition (WebGL + GSAP ScrollTrigger)</title>
<link rel="stylesheet" href="./style.css">
</head>
<body>
<div class="page">
<div class="header">How it's done</div>
<div class="content">
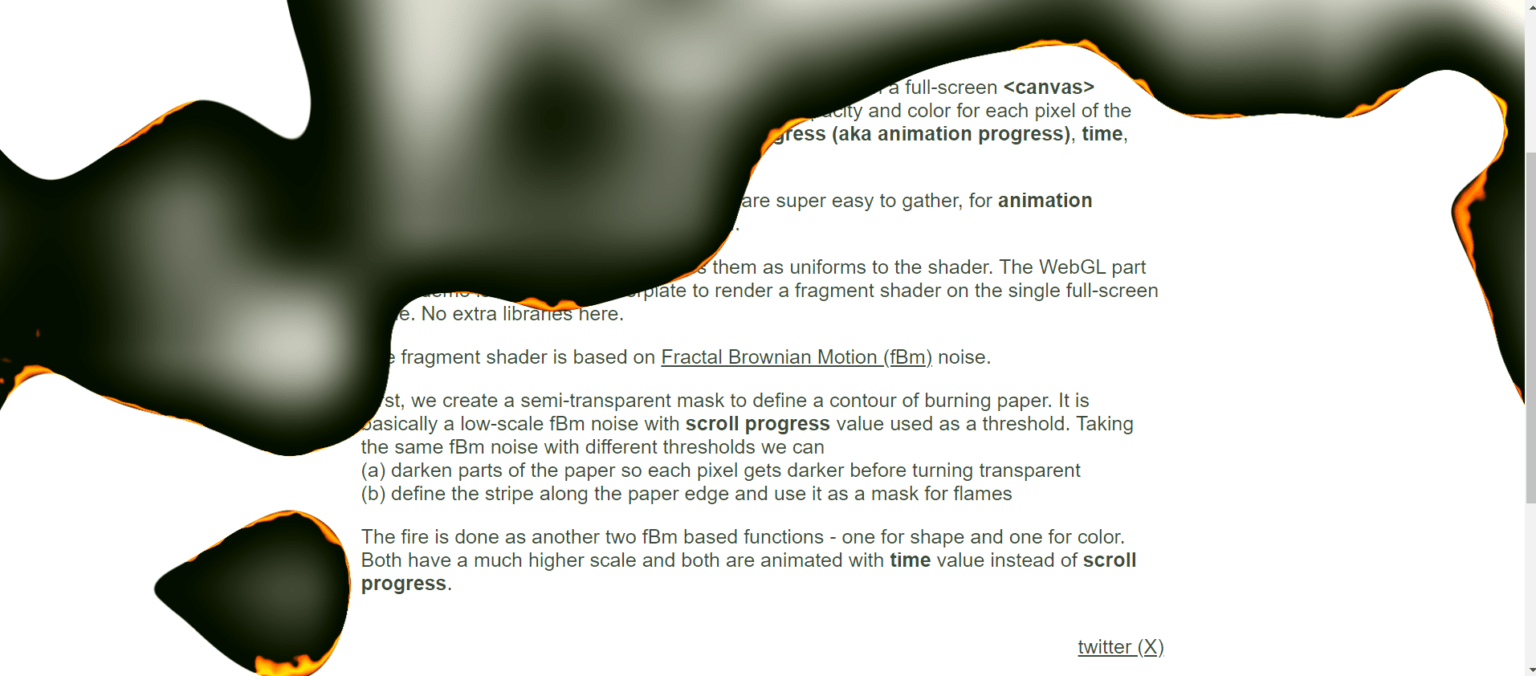
<p>The HTML content you're reading right now is overlaid with a full-screen <b><canvas></b> element. There is a fragment shader that defines opacity and color for each pixel of the <b><canvas></b>. Shader input values are <b>scroll progress (aka animation progress)</b>, <b>time</b>, and <b>resolution</b>.</p>
<p>While <b>time</b> and <b>window size (resolution)</b> are super easy to gather, for <b>animation progress</b> I use <a href="https://gsap.com/docs/v3/Plugins/ScrollTrigger/" target="_blank" rel="nofollow noopener">GSAP ScrollTrigger</a> plugin.</p>
<p>Once the inputs are prepared, we pass them as uniforms to the shader. The WebGL part of this demo is a basic JS boilerplate to render a fragment shader on the single full-screen plane. No extra libraries here.</p>
<p>The fragment shader is based on <a href="https://thebookofshaders.com/13/" target="_blank" rel="nofollow noopener">Fractal Brownian Motion (fBm)</a> noise.</p>
<p>First, we create a semi-transparent mask to define a contour of burning paper. It is basically a low-scale fBm noise with <b>scroll progress</b> value used as a threshold. Taking the same fBm noise with different thresholds we can (a) darken parts of the paper so each pixel gets darker before turning transparent (b) define the stripe along the paper edge and use it as a mask for flames.</p>
<p>The fire is done as another two fBm based functions - one for shape and one for color. Both have a much higher scale and both are animated with <b>time</b> value instead of <b>scroll progress</b>.</p>
<p class="last-line"><a href="" target="_top">twitter (X)</a></p>
</div>
</div>
<canvas id="fire-overlay"></canvas>
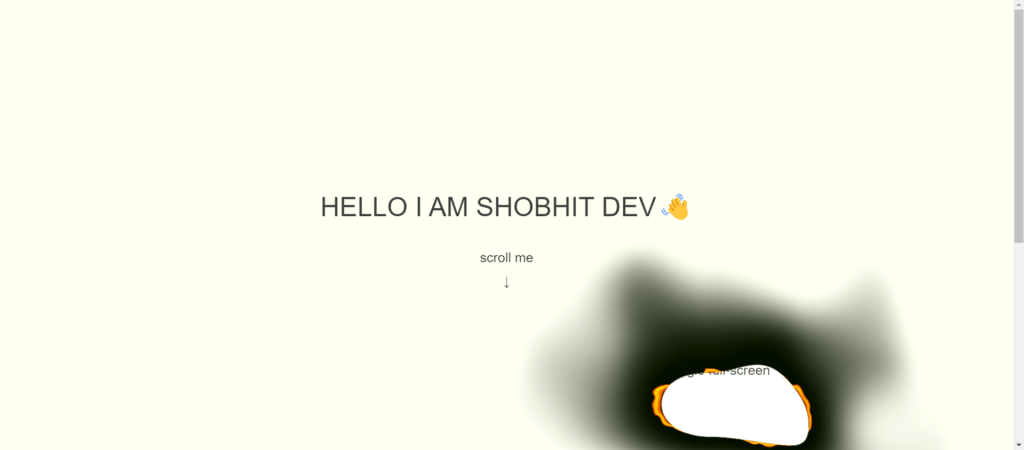
<div class="scroll-msg">
<div>Hello I Am Shobhit Dev 👋</div>
<div>scroll me</div>
<div class="arrow-animated">↓</div>
</div>
<script type="x-shader/x-fragment" id="vertShader">
precision mediump float;
varying vec2 vUv;
attribute vec2 a_position;
void main() {
vUv = a_position;
gl_Position = vec4(a_position, 0.0, 1.0);
}
</script>
<script type="x-shader/x-fragment" id="fragShader">
precision mediump float;
varying vec2 vUv;
uniform vec2 u_resolution;
uniform float u_progress;
uniform float u_time;
float rand(vec2 n) {
return fract(cos(dot(n, vec2(12.9898, 4.1414))) * 43758.5453);
}
float noise(vec2 n) {
const vec2 d = vec2(0., 1.);
vec2 b = floor(n), f = smoothstep(vec2(0.0), vec2(1.0), fract(n));
return mix(mix(rand(b), rand(b + d.yx), f.x), mix(rand(b + d.xy), rand(b + d.yy), f.x), f.y);
}
float fbm(vec2 n) {
float total = 0.0, amplitude = .4;
for (int i = 0; i < 4; i++) {
total += noise(n) * amplitude;
n += n;
amplitude *= 0.6;
}
return total;
}
void main() {
vec2 uv = vUv;
uv.x *= min(1., u_resolution.x / u_resolution.y);
uv.y *= min(1., u_resolution.y / u_resolution.x);
float t = u_progress;
vec3 color = vec3(1., 1., .95);
float main_noise = 1. - fbm(.75 * uv + 10. - vec2(.3, .9 * t));
float paper_darkness = smoothstep(main_noise - .1, main_noise, t);
color -= vec3(.99, .95, .99) * paper_darkness;
vec3 fire_color = fbm(6. * uv - vec2(0., .005 * u_time)) * vec3(6., 1.4, .0);
float show_fire = smoothstep(.4, .9, fbm(10. * uv + 2. - vec2(0., .005 * u_time)));
show_fire += smoothstep(.7, .8, fbm(.5 * uv + 5. - vec2(0., .001 * u_time)));
float fire_border = .02 * show_fire;
float fire_edge = smoothstep(main_noise - fire_border, main_noise - .5 * fire_border, t);
fire_edge *= (1. - smoothstep(main_noise - .5 * fire_border, main_noise, t));
color += fire_color * fire_edge;
float opacity = 1. - smoothstep(main_noise - .0005, main_noise, t);
gl_FragColor = vec4(color, opacity);
}
</script>
<script src='https://unpkg.com/gsap@3/dist/gsap.min.js'></script>
<script src='https://unpkg.com/gsap@3/dist/ScrollTrigger.min.js'></script>
<script src="./script.js"></script>
</body>
</html>
CSS Styling
The CSS defines the visual appearance of our webpage and ensures the content is displayed correctly. It also handles animations for the scroll prompt.
					body, html {
    margin: 0;
    padding: 0;
    font-family: sans-serif;
    font-size: 20px;
    color: #3d3d3d;
}

a {
    color: inherit;
}

.page {
    width: 100%;
    min-height: 180vh;
    display: flex;
    flex-direction: column;
    align-items: center;
    opacity: 0;
}

.page .header {
    display: flex;
    align-items: center;
    justify-content: center;
    font-size: 40px;
    text-transform: uppercase;
    width: 100vw;
    margin-top: 20vh;
    height: 25vh;
}

.page .content {
    max-width: 800px;
    padding: 10px;
}

.page .last-line {
    text-align: right;
    padding-top: 1em;
}

.page ::-moz-selection {
    background: #F7C02D;
}

.page ::selection {
    background: #F7C02D;
}

.scroll-msg {
    position: fixed;
    top: 0;
    left: 0;
    width: 100%;
    height: 100vh;
    display: flex;
    flex-direction: column;
    align-items: center;
    justify-content: center;
    pointer-events: none;
    padding-top: 2em;
}

.scroll-msg > div:nth-child(1) {
    margin-top: -10vh;
    padding-bottom: 1em;
    text-transform: uppercase;
    font-size: 2em;
}

canvas#fire-overlay {
    position: fixed;
    top: 0;
    left: 0;
    display: block;
    width: 100%;
    pointer-events: none;
}

.arrow-animated {
    font-size: 1em;
    animation: arrow-float 1s infinite;
}

@keyframes arrow-float {
    0% {
        transform: translateY(0);
        animation-timing-function: ease-out;
    }
    60% {
        transform: translateY(50%);
        animation-timing-function: ease-in-out;
    }
    100% {
        transform: translateY(0);
        animation-timing-function: ease-out;
    }
}
JavaScript for WebGL and GSAP ScrollTrigger
The JavaScript code brings our effect to life. It initializes the WebGL context, sets up shaders, and defines the animation logic using GSAP ScrollTrigger.
					const canvasEl = document.querySelector("#fire-overlay");
const scrollMsgEl = document.querySelector(".scroll-msg");

const devicePixelRatio = Math.min(window.devicePixelRatio, 2);

const params = {
    fireTime: .35,
    fireTimeAddition: 0
}

let st, uniforms;
const gl = initShader();

st = gsap.timeline({
    scrollTrigger: {
        trigger: ".page",
        start: "0% 0%",
        end: "100% 100%",
        scrub: true,
    },
})
    .to(scrollMsgEl, {
        duration: .1,
        opacity: 0
    }, 0)
    .to(params, {
        fireTime: .63
    }, 0)

window.addEventListener("resize", resizeCanvas);
resizeCanvas();

gsap.set(".page", {
    opacity: 1
})

function initShader() {
    const vsSource = document.getElementById("vertShader").innerHTML;
    const fsSource = document.getElementById("fragShader").innerHTML;

    const gl = canvasEl.getContext("webgl") || canvasEl.getContext("experimental-webgl");

    if (!gl) {
        alert("WebGL is not supported by your browser.");
    }

    function createShader(gl, sourceCode, type) {
        const shader = gl.createShader(type);
        gl.shaderSource(shader, sourceCode);
        gl.compileShader(shader);

        if (!gl.getShaderParameter(shader, gl.COMPILE_STATUS)) {
            console.error("An error occurred compiling the shaders: " + gl.getShaderInfoLog(shader));
            gl.deleteShader(shader);
            return null;
        }

        return shader;
    }

    const vertexShader = createShader(gl, vsSource, gl.VERTEX_SHADER);
    const fragmentShader = createShader(gl, fsSource, gl.FRAGMENT_SHADER);

    function createShaderProgram(gl, vertexShader, fragmentShader) {
        const program = gl.createProgram();
        gl.attachShader(program, vertexShader);
        gl.attachShader(program, fragmentShader);
        gl.linkProgram(program);

        if (!gl.getProgramParameter(program, gl.LINK_STATUS)) {
            console.error("Unable to initialize the shader program: " + gl.getProgramInfoLog(program));
            return null;
        }

        return program;
    }

    const shaderProgram = createShaderProgram(gl, vertexShader, fragmentShader);
    uniforms = getUniforms(shaderProgram);

    function getUniforms(program) {
        let uniforms = [];
        let uniformCount = gl.getProgramParameter(program, gl.ACTIVE_UNIFORMS);
        for (let i = 0; i < uniformCount; i++) {
            let uniformName = gl.getActiveUniform(program, i).name;
            uniforms[uniformName] = gl.getUniformLocation(program, uniformName);
        }
        return uniforms;
    }

    const vertices = new Float32Array([-1., -1., 1., -1., -1., 1., 1., 1.]);

    const vertexBuffer = gl.createBuffer();
    gl.bindBuffer(gl.ARRAY_BUFFER, vertexBuffer);
    gl.bufferData(gl.ARRAY_BUFFER, vertices, gl.STATIC_DRAW);

    gl.useProgram(shaderProgram);

    const positionLocation = gl.getAttribLocation(shaderProgram, "a_position");
    gl.enableVertexAttribArray(positionLocation);

    gl.bindBuffer(gl.ARRAY_BUFFER, vertexBuffer);
    gl.vertexAttribPointer(positionLocation, 2, gl.FLOAT, false, 0, 0);

    return gl;
}

function render() {
    const currentTime = performance.now();
    gl.uniform1f(uniforms.u_time, currentTime);

    gl.uniform1f(uniforms.u_progress, params.fireTime + params.fireTimeAddition);
    gl.drawArrays(gl.TRIANGLE_STRIP, 0, 4);

    requestAnimationFrame(render);
}

function resizeCanvas() {
    canvasEl.width = window.innerWidth * devicePixelRatio;
    canvasEl.height = window.innerHeight * devicePixelRatio;
    gl.viewport(0, 0, canvasEl.width, canvasEl.height);
    gl.uniform2f(uniforms.u_resolution, canvasEl.width, canvasEl.height);
    render();
}
Key Concepts
WebGL Shaders
Shaders are essential for rendering effects in WebGL. We use two types of shaders:
- Vertex Shader: Handles the processing of individual vertices.
- Fragment Shader: Computes the color and other attributes of each pixel.
In our example, the fragment shader is where the magic happens. It uses fractal Brownian motion (fBm) to create noise patterns that simulate the fire effect.
GSAP and ScrollTrigger
GSAP (GreenSock Animation Platform) is a powerful library for creating animations. ScrollTrigger, a plugin for GSAP, allows us to control animations based on the user’s scroll position. This is crucial for our on-scroll fire transition effect.
How It Works
- HTML Structure: The main content is overlaid with a full-screen
<canvas>element, which will be used for rendering the fire effect. - CSS Styling: Ensures the content is styled correctly and adds animations for the scroll prompt.
- WebGL Initialization: Sets up the WebGL context, compiles shaders, and links them into a shader program.
- GSAP ScrollTrigger: Creates a timeline that updates the fire effect’s progress based on the user’s scroll position.
- Rendering Loop: Continuously updates the canvas with new frames, creating a smooth animation.
Conclusion
Creating an on-scroll fire transition effect using WebGL and GSAP ScrollTrigger is a fantastic way to enhance your website’s interactivity and visual appeal. By understanding the key components and following the provided code, you can implement this effect on your own site, providing users with a memorable and engaging experience.
This tutorial covers the basics, but there’s plenty of room for experimentation and customization. Feel free to tweak the shaders, adjust the animation timings, and add your unique touch to the effect. The possibilities with WebGL and GSAP are endless, so let your creativity run wild!
